Paravirtulization with Citrix XenServer 5.5 and Ubuntu 9.10

Few days ago I had a task to P2V an old Ubuntu 9.10 machine. The P2V process was very easy and went smooth. The challenge was how to get this VM paravirtualized. After reading on the net how others have done this and what problems they had, I managed to finish my task pretty quick. Anyway... I hope maybe this post helps someone - definitely will help me if I will have to do this task again.

This post describes with simple step-by-step instructions how to install Ubuntu 9.10 VM as a paravirtualized virtual machine on a Citrix XenServer 5.5.

Creating Our Guest Ubuntu VM
Our first step is to get an Ubuntu VM installed as a typical HVM. You can find many different options on the web about partitioning and recommended partition sizes. A default installation of Ubuntu 9.10 will install on two partitions:

  • a root (/) partition, which includes the boot system (/boot), and
  • a swap partition.

For this article I installed Ubuntu with default partition options.

Configuring XenServer

First login on XenServer console.

Get UUID for the new created VM.

[codesyntax lang="bash"]

xe vm-list name-label="ubuntu-vm" params=uuid --minimal

[/codesyntax]

ed788e42-aabd-f78e-180a-5e46ec8b2465

Find the VM’s hard drive, known as a virtual block device (VBD):

[codesyntax lang="bash"]

xe vm-disk-list uuid=ed788e42-aabd-f78e-180a-5e46ec8b2465

[/codesyntax]

Disk 0 VBD:
uuid ( RO)             : ceb500b7-b154-2251-2fcd-5de05da50368
    vm-name-label ( RO): ubuntu10.04
       userdevice ( RW): 0

Mark the VBD as bootable:

[codesyntax lang="bash"]

xe vbd-param-set uuid=ceb500b7-b154-2251-2fcd-5de05da50368 bootable=true

[/codesyntax]

We don't want our VM to run as HVM:

[codesyntax lang="bash"]

xe vm-param-set uuid=ed788e42-aabd-f78e-180a-5e46ec8b2465 HVM-boot-policy=
xe vm-param-set uuid=ed788e42-aabd-f78e-180a-5e46ec8b2465 PV-bootloader=pygrub

[/codesyntax]

pygrub can’t handle grub2, so we have to manually set these parameters for paravirtualization:

[codesyntax lang="bash"]

xe vm-param-set uuid=ed788e42-aabd-f78e-180a-5e46ec8b2465 PV-bootloader-args="--kernel=/boot/vmlinuz-2.6.31-14-generic --ramdisk=/boot/initrd.img-2.6.31-14-generic"
xe vm-param-set uuid=ed788e42-aabd-f78e-180a-5e46ec8b2465 PV-args="root=UUID=706a70b4-09ee-4682-8f08-c8eb79ddd410 ro quiet"

[/codesyntax]

Notes:

  • 706a70b4-09ee-4682-8f08-c8eb79ddd410 - UUID for the bootable partition. You can find it in grub configuration file or using blkid command
  • if you have a separate partition for boot then you will have to change kernel and ramdisk parameters to --kernel=/vmlinuz-2.6.31-14-generic --ramdisk=/initrd.img-2.6.31-14-generic

Close and restart your XenCenter client (it appears to be a bit buggy and doesn’t let you type into the new console until it’s restarted), and boot up your VM (which will now start in PV mode).

Install XenServer tools

Attach the XenServer tools ISO image (xs-tools.iso) and mount the CD on your VM.

[codesyntax lang="bash"]

mount /dev/cdrom /mnt

[/codesyntax]

Install XenServer tools

[codesyntax lang="bash"]

dpkg -i /mnt/Linux/xe-guest-utilities_5.5.0-466_amd64.deb

[/codesyntax]

During the install, you would have likely noticed a couple errors, specifically:

update-rc.d: warning: xe-linux-distribution start runlevel arguments (S) do not match LSB Default-Start values (2 3 4 5)
...
[: 31: configure: unexpected operator

The package was build for Debian, not for Ubuntu so we don't have to worry about error message. We need to adjust the default start/kill runlevels.

[codesyntax lang="bash"]

update-rc.d -f xe-linux-distribution remove
update-rc.d xe-linux-distribution defaults

[/codesyntax]

Since now we are paravirtualized, XenServer will want to use HVC0, not the traditionally TTY.

[codesyntax lang="bash"]

sed -e "s/tty1/hvc0/ig" /etc/init/tty1.conf | sudo bash -c 'cat > /etc/init/hvc0.conf'

[/codesyntax]

Accessing GUI on ubuntu paravirtualized VM

If you try and start the GUI on a paravirtualized Ubuntu VM in XenServer, you’ll get the following error:

Primary device is not PCI
(EE) open /dev/fb0: No such file or directory
(EE) No devices detected

In a paravirtualized world there is no such thing as a physical console (nor is there a physical CPU, physical memory etc). Hence for completely paravirtualized OSes (with a paravirtualized kernel like Xen) there’s no GUI console.

In other words, use VNC for now:

Install VNC
[codesyntax lang="bash"]

apt-get install vnc4server

[/codesyntax]

Set the VNC resolution (whatever resolution you want to see on your desktop machine you’ll be using the VNC client on
[codesyntax lang="bash"]

vncserver -geometry 1280x1024 -depth 24

[/codesyntax]

Create a password and VNC server should create some configuration files and start up.

Now we need to edit one of the configuration files

[codesyntax lang="bash"]

vncserver -kill :1

[/codesyntax]

[codesyntax lang="bash"]

vim ~/.vnc/xstartup

[/codesyntax]

#!/bin/sh
# Uncomment the following two lines for normal desktop:
unset SESSION_MANAGER
exec sh /etc/X11/xinit/xinitrc

[ -x /etc/vnc/xstartup ] && exec /etc/vnc/xstartup
[ -r $HOME/.Xresources ] && xrdb $HOME/.Xresources
xsetroot -solid grey
vncconfig -iconic &
x-terminal-emulator -geometry 1280x1024+10+10 -ls -title “$VNCDESKTOP Desktop” &
x-window-manager &
[codesyntax lang="bash"]

:wq

[/codesyntax]

Start up the VNC server again
[codesyntax lang="bash"]

vncserver -geometry 1280x1024 -depth 24

[/codesyntax]

Troubleshooting

Can't type at login prompt.

I ran into one instance where I could see the login prompt but nothing I typed appeared.  First, make sure you click inside the console window.  If that does not resolve the issue, close and reopen XenCenter.  This fixed the issue when I encountered it.

PV is not working and I need to get the VM back up.

[codesyntax lang="bash"]

xe vm-param-set uuid= HVM-boot-policy="BIOS order"

[/codesyntax]

To return to PV mode, clear the HVM-boot-policy parameter.

[codesyntax lang="bash"]

xe vm-param-set uuid= HVM-boot-policy=

[/codesyntax]

Please note that HVM-boot-policy parameter IS case sensitive.

Links:
http://www.aikidokatech.com/?p=30
http://blog.403labs.com/post/1546501840/paravirtulization-with-citrix-xenserver-5-5-and-ubuntu
http://sysadmin.circularvale.com/server-config/accessing-a-gui-on-ubuntu-xenserver-vm/
Setting up a L2TP over IPSec VPN on Debian on 10 steps

This document describes the required steps to make a fully functional L2TP/IPSEC PSK VPN PSK (with pre-shared keys) on debian squeeze.

L2TP/IPSec is an advanced protocol formally standardized in IETF RFC 3193 and now the recommended replacement for PPTP where secure data encryption is required. The L2TP payload is encrypted using the standardized IPSec protocol. Regarding speed, L2TP/IPSEC encapsulates data twice making it less efficient and slightly slower than PPTP and OpenVPN.

L2TP/IPSEC uses 500/udp for the the initial key exchange, protocol 50 for the IPSEC encrypted data (ESP), 1701/udp for the initial L2TP configuration and 4500/udp for NAT traversal. L2TP/IPSec is easier to block than OpenVPN due to its reliance on fixed protocols and ports.

1. Install required packages

[codesyntax lang="bash"]

apt-get install xl2tpd openswan

[/codesyntax]

Note: Answer NO when asked if an X.509 certificate for this host can be automatically created or imported. This certificate can be created and imported later using:

[codesyntax lang="bash"]

dpkg-reconfigure openswan

[/codesyntax]

2. I always backup the original configuration files (you may skip this step if you want, but I highly not recommend it)

[codesyntax lang="bash"]

mv /etc/ipsec.conf /etc/ipsec.conf.orig
mv /etc/ipsec.secrets /etc/ipsec.secrets.orig
mv /etc/xl2tpd/xl2tpd.conf /etc/xl2tpd/xl2tpd.conf.orig
mv /etc/ppp/options.l2tpd /etc/ppp/options.l2tpd.orig

[/codesyntax]

3. Configure the Linux Kernel using command below

[codesyntax lang="bash"]

for each in /proc/sys/net/ipv4/conf/*
do
    echo 0 > $each/accept_redirects
    echo 0 > $each/send_redirects
done

[/codesyntax]

4. Configure /etc/ipsec.conf to work with PSK rather than X.509 certificates.

[codesyntax lang="bash"]

vim /etc/ipsec.conf

[/codesyntax]

config setup
protostack=netkey
nat_traversal=yes
oe=off

conn L2TP-PSK-NAT
rightsubnet=vhost:%priv
also=L2TP-PSK-noNAT

conn L2TP-PSK-noNAT
authby=secret
pfs=no
auto=add
keyingtries=3
rekey=no
ikelifetime=8h
keylife=1h
type=transport
left=x.x.x.x # <-- replace this IP address with the IPv4 address of this machine
leftprotoport=17/1701
right=%any
rightprotoport=17/1701

conn passthrough-for-non-l2tp
type=passthrough
left=x.x.x.x # <-- replace this IPv4 address with the IPv4 address of this machine
leftnexthop=0.0.0.0
right=0.0.0.0
rightsubnet=0.0.0.0/0
auto=route

5. Enter your prefer PSK to /etc/ipsec.secrets:

[codesyntax lang="bash"]

vim /etc/ipsec.secrets

[/codesyntax]

x.x.x.x %any: "mysecretpresharedkeypassword"

Note: The first field is the IPv4 address of this machine, the second field is the remote address (I am using %any to match anything) and the third field is the PSK password in quotes. You can have multiple lines in this file should you wish to add more entries.

6. Make sure the file /etc/ipsec.secrets is readable only by root and nothing else.

[codesyntax lang="bash"]

chmod 600 /etc/ipsec.secrets

[/codesyntax]

7. Setting up xl2tpd

[codesyntax lang="bash"]

vim /etc/xl2tpd/xl2tpd.conf

[/codesyntax]

[global]
port = 1701
auth file = /etc/xl2tpd/l2tp-secrets
access control = no
rand source = dev

[lns default]
exclusive = no
; enter the IP range you wish to give out to your clients here
ip range = 192.168.1.240 - 192.168.1.243
; address of the L2TP end of the tunnel (i.e. this machine)
local ip = 192.168.1.1
refuse authentication = yes
refuse pap = yes
refuse chap = yes
ppp debug = no
pppoptfile = /etc/ppp/options.l2tpd

8. Add PPP configuration to /etc/xl2tpd/ppp-options.xl2tpd file

[codesyntax lang="bash"]

vim /etc/ppp/options.l2tpd

[/codesyntax]

# Do not support BSD compression.
nobsdcomp
passive
lock

# Allow all usernames to connect.
name *
proxyarp
ipcp-accept-local
ipcp-accept-remote
lcp-echo-failure 10
lcp-echo-interval 5
nodeflate

# Do not authenticate incoming connections. This is handled by IPsec.
noauth
refuse-chap
refuse-mschap
refuse-mschap-v2

# Set the DNS servers the PPP clients will use.
ms-dns 8.8.8.8 # <-- change this to the IPv4 address of your DNS server
ms-dns 8.8.4.4 # <-- add extra entries if necessary

mtu 1400
mru 1400

9. IPsec configuration is done and you can verify it and you must get no errors:

[codesyntax lang="bash"]

ipsec verify

[/codesyntax]

Checking your system to see if IPsec got installed and started correctly:
Version check and ipsec on-path [OK]
Linux Openswan U2.6.28/K2.6.32-5-686 (netkey)
Checking for IPsec support in kernel [OK]
NETKEY detected, testing for disabled ICMP send_redirects [OK]
NETKEY detected, testing for disabled ICMP accept_redirects [OK]
Checking that pluto is running [OK]
Pluto listening for IKE on udp 500 [OK]
Pluto listening for NAT-T on udp 4500 [OK]
Two or more interfaces found, checking IP forwarding [OK]
Checking NAT and MASQUERADEing
Checking for 'ip' command [OK]
Checking for 'iptables' command [OK]
Opportunistic Encryption Support [DISABLED]

10. (re)start openswan and xl2tpd

[codesyntax lang="bash"]

/etc/init.d/ipsec restart
/etc/init.d/xl2tpd restart

[/codesyntax]

How to fix the error: "Not replacing deleted config file..."

Let's assume that when you are trying to install apticron the default config file is not created and when you are trying to execute postinst configure the following error message occurs:

Not replacing deleted config file /etc/apticron/apticron.conf

The fix is:

[codesyntax lang="bash"]

aptitude -o DPkg::Options="--force-confmiss" reinstall apticron

[/codesyntax]

How to export google sites data

First of all we are going to use a nice little tool called Google sites liberation (GSL). If you don't have time to read what is all about this tool I will quote from the User's Guide:

The Sites Liberation import/export tool uses the Sites GData API to allow users to export an entire Google Site as static html pages to a directory on their hard drive.

1. Download GSL locally.
[codesyntax lang="bash"]

wget -c http://google-sites-liberation.googlecode.com/files/google-sites-liberation-1.0.4.jar

[/codesyntax]

2. Execute GSL
[codesyntax lang="bash"]

java -jar google-sites-liberation-1.0.4.jar

[/codesyntax]

3. To export google sites data.
If you do use google apps then you will have to fill the fields as follows:
Host: sites.google.com
Domain: test.org
Webspace: webspace

Username: user
Password: password

If you don't use google apps then you will have to fill the fields as follows:
Host: sites.google.com
Domain:
Webspace: webspace

Username: user@gmail.com
Password: password

Where can you find the webspace? The webspace is usually the latest word in the link. Just take a look at the URL in your browser.
https://sites.google.com/site/webspace/
https://sites.google.com/a/test.org/webspace/

Autostart VM in free version of XenServer 6.x

Unlike previous versions, VMs do not have a visible property in the GUI allowing autostart, which kinda sucks big time. This has been claimed to interfere with High Availability (HA) and produced unexpected results during HA functions.

So, what we are going to do?!

First approach is to set auto_poweron parameter to true at the pool and VM level.

Setting the XenServer to allow Auto-Start
1. Gather the UUID’s of the pools you wish to auto-start.
To get the list of the pool’s on your XenServer type

[codesyntax lang="bash"]

xe pool-list

[/codesyntax]
2. Copy the UUID of the pool. If you have just one server, it will still have a pool UUID as bellow:

uuid ( RO)                : d170d718-e0de-92fc-b920-f4c59cc62e91
          name-label ( RW):
    name-description ( RW):
              master ( RO): 755d4ea3-373b-44b9-8ae3-3cd6f77a7f33
          default-SR ( RW): 51218f44-6ac6-4893-98fb-f924b08f7af9

3. Set the pool or server to allow auto-start:

[codesyntax lang="bash"]

xe pool-param-set uuid=UUID other-config:auto_poweron=true

[/codesyntax]
Note: *Replacing UUID with the UUID of the XenServer or pool.

Setting the Virtual Machines to Auto-Start
1. Gather the UUID’s of the Virtual Machine you want to auto-start by typing:
[codesyntax lang="bash"]

xe vm-list

[/codesyntax]

Note: This generates a list of Virtual Machines in your pool or server and their associated UUID’s.

2. Copy the UUID of the Virtual Machines you want to auto-start, and type the following command for each Virtual Machine to auto-start:
[codesyntax lang="bash"]

xe vm-param-set uuid=UUID other-config:auto_poweron=true

[/codesyntax]

Note: *Replace UUID with the UUID of the Virtual Machine to auto-start.*

For this second part (enabling auto-start for the VMs) we can use a little one-line script, which would enable autostart for ALL vms:

[codesyntax lang="bash"]

for i in `xe vm-list is-control-domain=false –minimal | tr , ‘  ’`; do xe vm-param-set uuid=$i other-config:auto_poweron=true; done

[/codesyntax]

Edit rc.local file to start all vms with "auto_poweron" in their other-config

Add the following lines at the end of /etc/rc.local file:

[ -e /proc/xen ] || exit 0

XAPI_START_TIMEOUT_SECONDS=240

# wait for xapi to complete initialisation for a max of XAPI_START_TIMEOUT_SECONDS
/opt/xensource/bin/xapi-wait-init-complete ${XAPI_START_TIMEOUT_SECONDS}

if [ $? -eq 0 ]; then

pool=$(xe pool-list params=uuid --minimal 2> /dev/null)

auto_poweron=$(xe pool-param-get uuid=${pool} param-name=other-config param-key=auto_poweron 2> /dev/null)
if [ $? -eq 0 ] && [ "${auto_poweron}" = "true" ]; then
logger "$0 auto_poweron is enabled on the pool-- this is an unsupported configuration."

# if xapi init completed then start vms (best effort, don't report errors)
xe vm-start other-config:auto_poweron=true power-state=halted --multiple >/dev/null 2>/dev/null || true
fi
fi

Second approach is to use vApp

1. Create vApp
2. Choose vms to vApp
3. Choose boot order and delays between starts
4. To get uuid of vApp use:

[codesyntax lang="bash"]

xe appliance-list name-label="name-vapp"

[/codesyntax]

5. Edit rc.local file to start vApp:

[codesyntax lang="bash"]

echo "sleep 40" >> /etc/rc.local
echo "xe appliance-start uuid=uuid-vapp" >> /etc/rc.local

[/codesyntax]
7. Save file, reboot XenServer

Links:
http://support.citrix.com/article/CTX133910
http://run.tournament.org.il/citrix-xenserver-6-0-enable-vm-autostart/
http://blog.wallenqvist.se/2012/06/04/371/
http://forums.citrix.com/message.jspa?messageID=1677077#1677077
https://github.com/xen-org/xen-api/tree/master/scripts

How to install Nagios Grapher on debian squeeze

In case you don't have nagios installed, you need to install it as described here

After installing nagios, please install the following packages:
[codesyntax lang="bash"]

apt-get install autoconf rrdtool perl perl-base perl-modules libcalendar-simple-perl libgd-gd2-perl perlmagick librrds-perl liburi-perl

[/codesyntax]

Download Nagios Grapher source code:
[codesyntax lang="bash"]

wget -c http://downloads.sourceforge.net/project/nagiosgrapher/nagiosgrapher/NagiosGrapher-1.7.1/NagiosGrapher-1.7.1.tar.gz

[/codesyntax]

Extract the archive
[codesyntax lang="bash"]

tar xfvz NagiosGrapher-1.7.1.tar.gz

[/codesyntax]

Run the NagiosGrapher configure script
[codesyntax lang="bash"]

cd NagiosGrapher-1.7.1
autoconf
./configure

[/codesyntax]

Check the output
checking for a BSD-compatible install... /usr/bin/install -c
checking for gawk... no
checking for mawk... mawk
checking for perl... /usr/bin/perl
checking distribution... found debian
checking for layout... debian
checking layout: directory prefix... set to '/usr/local/nagios'
checking for init_scripts/nagios_grapher.debian... yes
checking if user www-data exists... found
checking if group www-data exists... found
configure: creating ./config.status
config.status: creating Makefile
config.status: creating bin/collect2.pl
config.status: creating bin/fifo_write.pl
config.status: creating lib/NagiosGrapher.pm
config.status: creating lib/NagiosGrapher/HTML.pm
config.status: creating lib/NagiosGrapher/Hooks/Generic.pm
config.status: creating lib/NagiosGrapher/Hooks/SrvExtWriteHostextInfo.pm
config.status: creating sbin/graphs.cgi
config.status: creating sbin/rrd2-graph.cgi
config.status: creating sbin/rrd2-system.cgi
config.status: creating nagios_grapher
config.status: creating cfg/ngraph.ncfg
config.status: creating cfg/logrotate/nagios_grapher

The important options are distribution, layout, directory prefix and init_scripts
checking distribution... found debian
checking for layout... debian
checking layout: directory prefix... set to '/usr/local/nagios'
checking for init_scripts/nagios_grapher.debian... yes

Checking the required perl-libs
[codesyntax lang="bash"]

make testdeps

[/codesyntax]

/usr/bin/perl ./tools/testdeps.pl
Checking Data::Dumper ... found
Checking File::Copy ... found
Checking File::Basename ... found
Checking Carp ... found
Checking POSIX ... found
Checking Time::HiRes ... found
Checking Time::Local ... found
Checking Storable ... found
Checking GD ... found
Checking Image::Magick ... found
Checking RRDs ... found
Checking CGI ... found
Checking CGI::Carp ... found
Checking IO::Handle ... found
Checking URI::Escape ... found
Checking Calendar::Simple ... found

If you have a not found you can install the required perl modules with CPAN, or your distributions software management system.

Installing the NagiosGrapher
[codesyntax lang="bash"]

make install

[/codesyntax]

Source: https://www.monitoringexchange.org/wiki/HowTos:BestPractice:NagiosGrapher

How to install nagios3 from source on debian squeeze

1. First we will need to install the prereq’s by running:
[codesyntax lang="bash"]

apt-get install apache2 build-essential libgd2-xpm-dev libperl-dev openssl gcc make autoconf automake mailutils libssl-dev libmysqld-dev libmysqlclient-dev libldap2-dev libradiusclient-ng-dev libapache2-mod-php5 libsnmp-perl nfs-common nfs-kernel-server libnet-dns-perl libnet-snmp-perl libdbi-perl libapache2-request-perl libdbd-mysql-perl libcrypt-ssleay-perl mysql-client libnet-tftp-perl snmp

[/codesyntax]

2. Adding the Nagios user:
[codesyntax lang="bash"]

groupadd -g 9000 nagios && groupadd -g 9001 nagcmd && useradd -u 9000 -g nagios -G nagcmd -d /usr/local/nagios -c "Nagios User" nagios

[/codesyntax]

3. Download Nagios and Nagios plugins:
[codesyntax lang="bash"]

wget -c http://downloads.sourceforge.net/project/nagios/nagios-3.x/nagios-3.5.0/nagios-3.5.0.tar.gz
wget -c http://downloads.sourceforge.net/project/nagiosplug/nagiosplug/1.4.16/nagios-plugins-1.4.16.tar.gz

[/codesyntax]

4. Untar the archives:
[codesyntax lang="bash"]

tar xfvz nagios-3.5.0.tar.gz
tar xfvz nagios-plugins-1.4.16.tar.gz

[/codesyntax]

5. Compile Nagios
[codesyntax lang="bash"]

cd nagios
./configure --enable-nanosleep --enable-embedded-perl --with-command-group=nagcmd --with-gd-lib=/usr/lib --with-gd-inc=/usr/include

make all
make install
make install-init
make install-config
make install-commandmode
make install-webconf
cd ..

[/codesyntax]
6. Compile Nagios plugins:
[codesyntax lang="bash"]

cd nagios-plugins-1.4.16
./configure --with-nagios-user=nagios --with-nagios-group=nagios
make
make install
cd ..

[/codesyntax]
7. Add nagiosadmin user to the apache2
[codesyntax lang="bash"]

htpasswd -c /usr/local/nagios/etc/htpasswd.users nagiosadmin

[/codesyntax]

8. Restart apache2 webserver
[codesyntax lang="bash"]

/etc/init.d/apache2 restart

[/codesyntax]

9. Add www-data user to nagcmd group

[codesyntax lang="bash"]

usermod -a -G nagcmd www-data

[/codesyntax]

10. Install nrpe server

[codesyntax lang="bash"]

wget -c http://downloads.sourceforge.net/project/nagios/nrpe-2.x/nrpe-2.14/nrpe-2.14.tar.gz
tar xfvz nrpe-2.14.tar.gz
cd nrpe-2.14
./configure --enable-command-args
make all
make install
cp init-script.debian /etc/init.d/nrpe-server
chmod 755 /etc/init.d/nrpe-server

[/codesyntax]

11. Configure nrpe server

[codesyntax lang="bash"]

cp -a sample-config/nrpe.cfg /usr/local/nagios/etc/

[/codesyntax]

12. Start services

[codesyntax lang="bash"]

/etc/init.d/nagios start
/etc/init.d/nrpe-server start

[/codesyntax]

Troubleshooting

If you get something like bellow:

Error: Could not stat() command file ‘/usr/local/nagios/var/rw/nagios.cmd’!
The external command file may be missing, Nagios may not be running, and/or Nagios may not be checking external commands.
An error occurred while attempting to commit your command for processing.

Return from whence you came

Just do the following:

[codesyntax lang="bash"]

ls -l /usr/local/nagios/var/rw/nagios.cmd

[/codesyntax]
prw-rw---- 1 nagios nagios 0 Aug 11 22:27 /usr/local/nagios/var/rw/nagios.cmd

[codesyntax lang="bash"]

chmod -R g+x /usr/local/nagios/var/rw
ls -l /usr/local/nagios/rw/nagios.cmd

[/codesyntax]
prw-rwx--- 1 nagios nagios 0 Aug 11 22:27 /usr/local/nagios/var/rw/nagios.cmd

[codesyntax lang="bash"]

/etc/init.d/nagios restart

[/codesyntax]

Also change group of the file
[codesyntax lang="bash"]

ls -l /usr/local/nagios/var/rw/nagios.cmd

[/codesyntax]
prw-rw---- 1 nagios nagios 0 Aug 11 22:27 /usr/local/nagios/var/rw/nagios.cmd

[codesyntax lang="bash"]

chown nagios:www-data /usr/local/nagios/var/rw/nagios.cmd

[/codesyntax]

And also, you may need to do the following and restart apache afterwards (I am pretty sure that you skipped by accident the step 9)
[codesyntax lang="bash"]

usermod -G nagios www-data
/etc/init.d/apache2 restart

[/codesyntax]

Knoppix - PXE boot install rescue

This document describes how boot a Knoppix from PXE Server. I am assuming that you already setup PXE booting BEFORE you start doing this. If you don't, and you have CentOS please read this page or if you have a Debian/Ubuntu please read this page.

We are going to use Knoppix and a NFS server required by knoppix to successfully network boot. If you don't have a NFS server or you don't know how to setup one, please read this page (this page covers only the NFS Server setup for CentOS).

First of all we are going to download Knoppix.

[codesyntax lang="bash"]

wget -c http://xenia.sote.hu/ftp/mirrors/knoppix/KNOPPIX_V7.0.4CD-2012-08-20-EN.iso

[/codesyntax]

Generating the required files to PXE boot

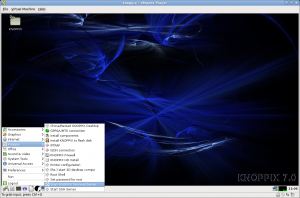
Knoppix has the built-in ability to auto-configure itself to network boot itself, and this makes the process rather easy. In the KNOPPIX submenu, select the Start Terminal Server option.

knoppix - VMware Player

knoppix - VMware Player

IMPORTANT NOTE! By doing this, it will start up dhcp, and many other services! Running two DHCP servers on the same subnet is generally a very bad idea!
When prompted, select the menu item to configure the terminal server, and run through that.

There are some approaches to don't start more DHCP server:
1. Start Knoppix in a Virtual Machine that has eth disconnected
2. Start Knoppix on a Physical Machine with network cable unplugged (be sure to stop DHCP Server on Knoppix before plug the cable back).

If you are looking in the /tftpboot directory you will find three files that are important to us: kernel, miniroot.gz, and pxelinux.cfg/default. The first is the kernel used to start knoppix, the second is the needed initrd to boot knoppix, and the last one contains all needed settings for your pxelinux configuration. "kernel" is a very generic kernel name, so I renamed mine to "knoppix-kernel", and the miniroot.gz to "knoppix-miniroot.gz"

[codesyntax lang="bash"]

mv /tftpboot/kernel /tftpboot/knoppix-kernel
mv /tftpboot/miniroot.gz /tftpboot/knoppix-miniroot.gz

[/codesyntax]

Copy these files to your PXE booting server

[codesyntax lang="bash"]

rsync -avz --stats --progress --partial /tftpboot/knoppix* root@PXE-booting-server:/tftpboot/netboot/knoppix

[/codesyntax]

PXE configuration

On you PXE booting server add the following lines on /tftpboot/pxelinux.cfg/default

[codesyntax lang="bash"]

vim /tftpboot/pxelinux.cfg/default

[/codesyntax]

label knoppix
MENU LABEL knoppix
kernel /netboot/knoppix/knoppix-kernel
append nfsdir=172.20.30.1:/knoppix nodhcp lang=us ramdisk_size=100000 init=/etc/init apm=power-off nomce vga=791 xmodule=fbdev initrd=/netboot/knoppix/knoppix-miniroot.gz BOOT_IMAGE=knoppix

Please note that if you want your Knoppix to boot into runlevel 2 then you have to change vga=791 to vga=normal 2

How to setup a NFS server on CentOS 6

This document describes how to configure your CentOS 6.x linux to act as a NFS Server to share any directories on your Network

Install required software

[codesyntax lang="bash"]

yum install nfs-utils

[/codesyntax]

Configure NFS server

[codesyntax lang="bash"]

vim /etc/idmapd.conf

[/codesyntax]

# line 5: uncomment and change to your domain name
Domain = test.org

Configure NFS shares

[codesyntax lang="bash"]

vim /etc/exports

[/codesyntax]

/home 10.0.0.0/24(rw,sync,no_root_squash,no_all_squash)

Note:
/home -> shared directory
10.0.0.0/24 -> range of networks NFS permits accesses
rw -> writable
sync -> synchronize
no_root_squash -> enable root privilege
no_all_squash -> enable users' authority

Start NFS services

[codesyntax lang="bash"]

/etc/rc.d/init.d/rpcbind start
/etc/rc.d/init.d/nfslock start
/etc/rc.d/init.d/nfs start

[/codesyntax]

Set services to start at boot

[codesyntax lang="bash"]

chkconfig rpcbind on
chkconfig nfslock on
chkconfig nfs on

[/codesyntax]

Source: http://www.server-world.info/en/note?os=CentOS_6&p=nfs

How to clone a running Linux system over network using netcat

This is a short but potentially extremely handy guide to ghosting one Linux box to another (or simply making a full backup of a desktop/server).

On the target machine:
[codesyntax lang="bash"]

nc -p 2222 -l | bzip2 -d | dd of=/dev/hdb

[/codesyntax]

On the source machine:
[codesyntax lang="bash"]

bzip2 -c /dev/hda | nc 10.111.1.206 2222

[/codesyntax]

Note:

  • please be VERY careful about IPs, devices and ports.
  • after completion of dd command you have to run fsck on target partitions